- Current management settings according ip-info, system-name and all other info you might need.
- Current VM's that need to be restored afterwards, and their location on the Datastore within vSphere Client, and all Datastore info.
- License agreement keys?
- Appropriate iso CD (or file) with a full ESXi 4.1 installation on it.
- Access to local screen and keyboard of the Host to re-enter ip-settings! (Or a remote server adapter to take over local screen and keyboard.)
NOTE: Make sure you select (R) Repair and NOT (Enter) Install within this process !!!
(Pictures are from 4.1 installer)

At any time you can cancel the installation process, a confirmation screen will show up:
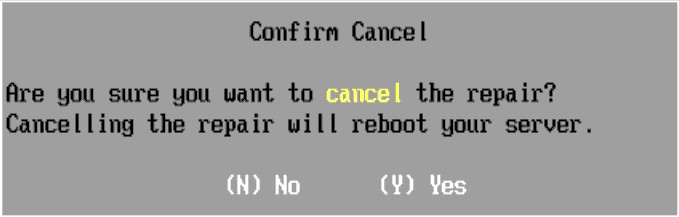
NOTE: If this screen stays on for about 2 minutes it will assume a Yes!
When pressing 'y'es a reboot screen will be shown and the Host reboots.
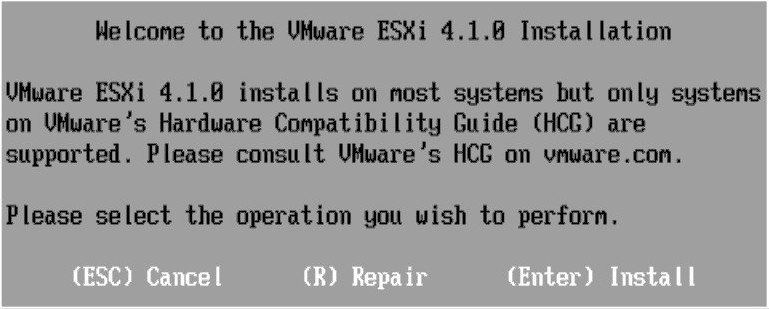
After the boot loader has finished, press 'R' to repair the Host.
DO NOT USE ENTER HERE !!! ALL DATA WILL BE LOST!
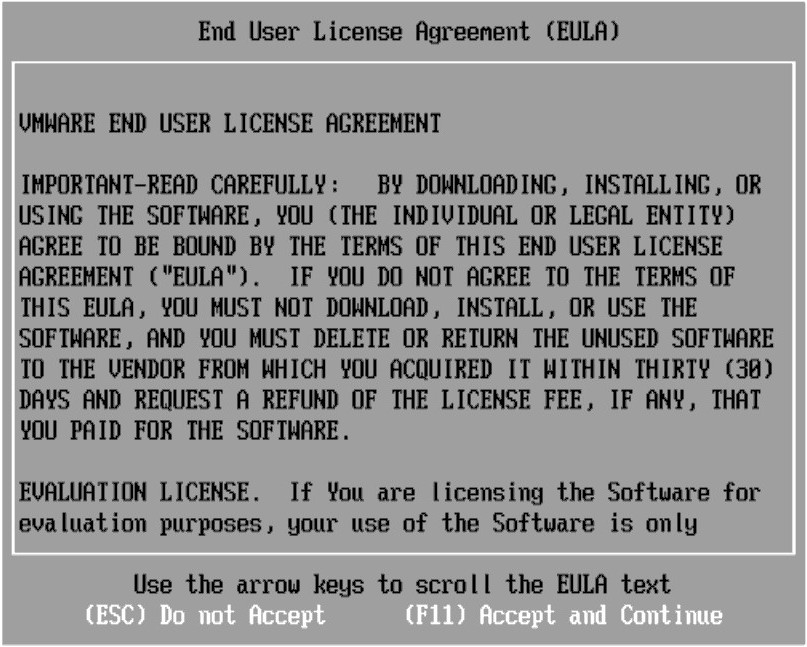
Now press F11 to accepts the license agreement:
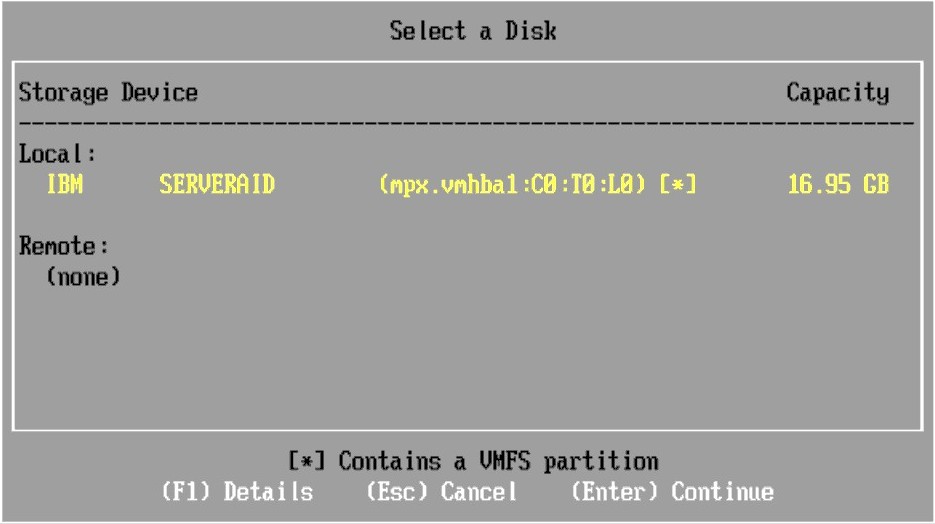
Select the disk where the Host has installed ESXi previous ([*] Contains a VMFS partition):
Notice the following message, then press enter:

With the tests I did, i never had any notification about destroyed data.
If you do get a message it could mean that the disk is (too) full. Stop this process, 1st get more space free on your Host disk!!
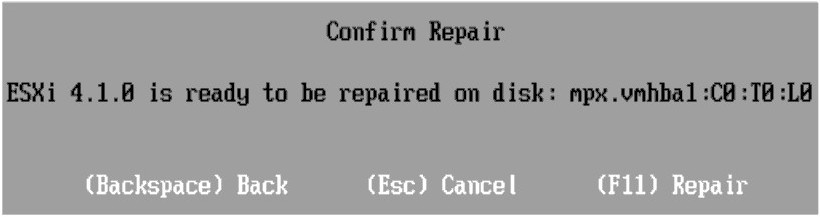
Press F11 to start the Repair process:
The progress monitor:

Normally this should result in:

Act as requested, remove CD and reboot:
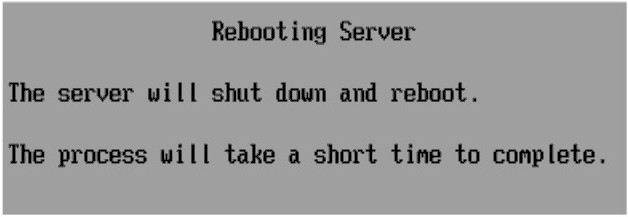
After the 're-installation' has finished, act as asked, remove CD and reboot Host.
You will see the old version will boot. But all ip settings are gone, so enter the 'old' network settings noticed earlier, using F2 on the main screen.
Notice that the password is also set to '' and has to be reset, otherwise vSphere Client will later ask you to change it later.
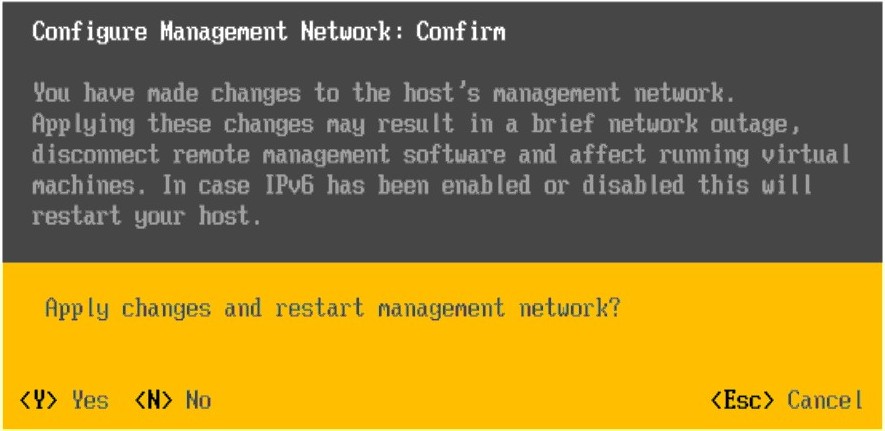
Before escaping back to main menu, accept 'Apply changes and restart management network', by pressing: y
Escape (back) to main screen and check the right ip address is shown.
Connect vSphere Client to this Host.
When a big step is made, vSphere Client could be needed a re-install also, and will ask you when started.
Your licenses will be set back to 60 days, re-enter license keys after all VM's are back online!
You notice all Pools and VM's are lost!!
Make just 1 Pool with default settings, or restore the old Pool configuration. A pool can be handy to reduce CPU or Memory usage on a group of VM's.
Check if the Datastore is configured as expected.
If this is not ok, change your 'Configuration' settings of 'Storage Adapters' and/or 'Storage', and check again.
I used local disks to test this downgrade, Datastore always came back as requested. I did NOT tried remote storage or what so ever with this process!
With right mouse button within vSphere Client, browse your Datastore.
All your VM's in their directories should be there!
Inside a directory right select the .vmx file and use 'Add to Inventory'.
Try to boot a restored VM and it should work as before!
If for some reason your VM will NOT work you should investigate events of vSphere Client to determine the cause.
I don't know how VMware Tools will react on this downgrading process!!
Re-install of lower version of VMware Tools might be a solution because the internal Tools are also set back to older levels. But be aware!! Have a good running system back, 1ST MAKE A BACKUP?
Now it could a good time to re-enter license keys.
Tested:
ESXi 4.1 from build level:
- 988178 to 348481
- 348481 to 208167 (ESXi 4.0) ..... vSphere Client needs re-install, not tested, but looks ok!
Can this procedure also help people with lost root password?
root password is set back to nothing again ... It needs to be set!
Use the latest ESXi 4.1 iso CD to boot from and follow the process above.
Also all patches that were applied before, should be re-run over this 'newly' installation.
..